Saturday, September 19, 2009

Because I'm a dufus (sometimes), that's why!

I went to Joann's today to see if I could score some iron-on vinyl. Because they said (over the phone) that they had it. They lied. But that's not the story I'm here to tell.

I wandered around a bit, because tomorrow is the beginning of a big sale, and I have a big pile of coupons and was scoping out what I might want to come back and get, at 40% off.....

Wandering about leads to trouble.

Along the way I passed some table cloth material.... I lingered a bit at those, thinking about getting some more fabric to make a few more table cloths. We used to get those flannel backed vinyl table cloths at Walmart and they were good for at least six to eight months before starting to crack or rip. For less than $3.00, they were a hit with me. Clean up was a breeze after dinner, etc.

Then they changed how they make them and what they make them with. The vinyl was now about the thickness of newsprint. It lasted about as long as newsprint would last, too. Within a week, we'd have the first tear. Karen griped about them and asked if we could just use table cloths. In a moment of weakness, I put one on the table and then I was the one griping. More laundry, stains, flimsy, etc.

Right next to the table cloth material at Joann's was some flannel backed vinyl. But it didn't feel much better than the Walmart ones. Next to that, things got more interesting. There were two grades of upholstery vinyl. One was $9.99 a yard and one was $12.99 a yard. The 9.99 type had flannel backing. The $12.99 stuff was very heavy, and just cloth on the back.

Since they didn't have the iron-on vinyl I went in there for, I decided to use my coupon on 2+ yards of the lower grade upholstery vinyl. I figured this imitation "hide-of-the-nauga" might make a decent table cloth. I grabbed some premade binding and figured I'd just slap that around the edges and call it done.

So out the door I went. I came home and carefully measured the table. I added six inches for the drop..... long enough to hang down and look decent, but short enough that Michael wouldn't get all tangled up in it, because he spends a lot of time at the kitchen table. I used my quilting ruler to make it nice and rectangular and cut the excess away.


I was just about done cutting the excess off the side when I started screaming.

Yeah, you probably saw that one coming. My mad math skillz strike again. Table width plus drop equals....


Wait.

A table has TWO sides? ..... each way? .....who knew!?


Right about now, my dad is reading this and probably doing a face-plant into his keyboard, muttering "Oh Joy! I bought you the pencils and paper, sharpened them even, drove you to school......"

He probably wants a refund for school supplies. Poor guy - he tutored me for hours and hours and hours in math, geometry, and logical thinking..... I got through high school math by the skin of my teeth, and he was gray by the time we were done. It was his sage advice that I never go into the computer field, as I was a tad short on the logical thinking abilities. Ahem...Don't ask me how the heck I ended up working on a computer all day, every day, for decades. I have no idea how that happened.

I've gotten a little better over the years. But this was just ......

Yep. A bone-head move.

Well, after I stopped screaming, I sort of sat in a stupor thinking, "How can I salvage this?" My first idea was to get back in the car and go buy more. I really need to start going with my first ideas more often. They are usually quicker in execution!


But no. My Mom raised a frugal Scot. She did her job very well. I was going to find a way to make it work, if it killed me.

It's a little easier to fix a mistake like this if you have a stash hiding upstairs. I looked through my stash, but found nothing suitable. I snuck into the Ms. Ellen Stash (thank you, Ellen!!) and looked for something that would go with the beige vinyl. I found a cute print that looked promising and there was a little over a yard, which I figured would be enough.

I cut strips of fabric. I raided my batting trash bag, and pulled out pieces and sewed batting strips together too.


I'd always wanted to try sewing batting scraps together and hey, it works!

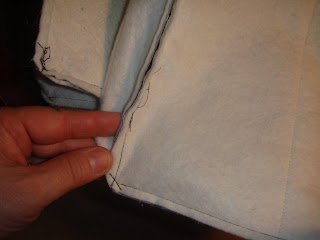
I turned down one edge of the fabric strips and slipped the batting strips under the edge and stitched it in place. Then I sewed the fabric to the vinyl, and top-stitched it (which served to catch the hem on the back).


My idea about running back to get more fabric would have been way quicker. I was just going to use the purchased binding and make something quick and easy.

But I like this better.


I like it so much, I think I may do it on purpose in December, with Christmas Red vinyl and a Christmas print!!


I would never have thought of doing this, if I hadn't screwed it up originally.....

Next time it will be way easier. I won't cut the sides incorrectly, so there will be no need for batting. I will just make a very wide binding that encases the edge of the vinyl....

:)

Thursday, September 17, 2009

Because I'm a hippie, that's why....


I found this material in Joann's not long ago, and armed with a 40% off coupon, dragging Michael along behind me (armed with his own coupon), we exited the store with a yard of the stuff and a yard of a coordinating piece also. If memory serves, the two yards of fabric ended up being $2.40 apiece.


So I tried another pattern. It was pretty easy, and start to finish (from cutting out pieces right on through to vacuuming the sewing room floor) was about four hours.


I did not make the big poofy sash/bow.... I'm not that kind of girl.... Just a plain old ordinary hippie in jeans and a teeshirt!!


I'm not sure I like this purse as much as the last one. I'm sure it's just me, but I am not crazy with how open the sides are.


I get the perception that all my "stuff" is in danger of toppling out. But I have not used it, so that may just be an unfounded concern. It also did not call for an inside pocket and my feeble brain didn't remind me that I'd like a couple of them. Anyway, I'll give it a road test tomorrow when I meet Laurie and Jason in the evening!


And now, for something truly gorgeous..... Look at what my sister just finished for my niece!!


Click to embiggen - it's all kitties and Sew Cute!!

Awesome!!!!

Way to go Jacque!!!!

Tuesday, September 15, 2009

Brownies and a Bag....


Mr. B pulled out "Big Red" and made brownies a few days ago. In the September 2nd L.A. Times, he found a recipe for brownies from the famous Boudin Bakery.


He whipped these up, and the house smelled fantastic. They were really good! (Before when he was licking beaters, and after baking!!)


While he was occupied in the kitchen, I've been sewing again! I'm trying these days to balance a bit of painting around the house, typing for income, and time in my Happy Place (sewing room).


Yesterday I tackled this!


The pattern was not difficult, for the most part. I had no issues at all making the outer purse and the inner lining (an exact copy). I added a thin, thin layer of batting to mine, because I really would like it to be a bit stronger than the interfacing I had on hand.


I did the corners a bit differently than the pattern called for. I got as close as I could, and then just stitched across them. The view from the pretty side is perfect, so I like my method.


My only issue was putting the two together. After the inner and outer purse bodies are stitched together along the top (the part where you open and close the purse) then I had to turn remaining parts under, and top stitch them. this included the corners of the top of the purse where it met the straps. This was easy except for those four corners where the purse met the straps.


Not fun. A very slow go.... but doable!!


(click to embiggen!)

I have a second identical one made (!), and only have that hard top stitching portion to complete. I will have made two purses for a whopping grand total of $6.00. (Two pieces of corresponding fabric bought with Joann's coupons at 40% off! Whoo hoo!) The brown button used for closure is out of my Nana's button box.... That made me smile!


I used the purse today and I love it. The cloth strap doesn't fall off my shoulder.... I may lengthen the strap a few inches if I make this again someday in a different fabric. All in all, Me Likeeee!


Edited later same night:

Here's what I mean by the somewhat more difficult portion of the pattern. The curved portion of the purse front top and back top have been sewn. These are pinned just to ready for top-stitching. The corners (4) and both sides of the strap are pinned together to be top-stitched, which is in effect, the only stitching holding the front and back of the strap together. Not impossible, but it takes slow, fairly precise stitching.


Sew Worth It!!


:)

Thursday, September 10, 2009

Finally, something quilty....

We got ambitious this month! Yvette and Karene and I got together to do TWO of the Home is Where the Heart Is blocks...September and October.

Ellen joined us and we had a great time catching up on all the latest news and picking out fabrics for our blocks.


Here are September's.....


And while we made significant progress on October, none of them were complete or ready for pictures... So I'll try to show them later!

This all took place last Friday! I am a bad blogger. It took me a week to post it. It also took me a week to get back upstairs in my sewing room. When I did, I simply did not want to blanket stitch! So tonight, I picked out one of my 4,592 projects and got started.

First the fabrics....


I think at least two were from Ms. Ellen's Stash, and one was from mine....These fabrics looked "hot" to me, and since I was going to be making this:


I thought they were appropriate! This is a pattern for an insulated iron carrier. I had a ball making it. And it was the perfect evening project....start to finish, it took about four hours. It has Insul-Brite inside and supposedly, this means you can place a hot iron in it.... and the Insul-Brite keeps it from burning anything it sits on. So you can fling it in your car after a quilt class with abandon and supposedly not melt the carpet or burn the seat.


I have only one question. The Insul-Brite is on the inside. However, there is a lovely 100% cotton lining that the iron will rest on. If you put a hot iron in this bag, I know the Insul-Brite will protect anything you then put the iron down on....

But will the liner burn?

Inquiring minds want to know.... ;)